Some of the best advice I’ve ever received as an indie developer is to start your project right away.
Large triple-A studios start with a long design, concept, and prototyping process. While that process is effective for large studios, it can bog down indie or solo developers.
Often, the best first step after coming up with an idea for a game is to put the most base or core mechanic into code. The goal of this step is to make a simple game to test if it will even work.
This provides you with something you can actually see: real results. It then creates a starting point from which you can grow your project.
In this tutorial, we will walk through the start of that process together in a game engine made for 2D games and rapid development: GameMaker Studio 2 from Yoyo Games.

The GameMaker name has been around for a bit, and many amazing and successful games have been made using this game development tool. For example, Undertale, Hyperlight Drifter, and Hotline Miami were all made using GameMaker Studio.
A Note About Game Engines
While I really enjoy using GameMaker Studio 2, there are a plethora of paid and free game engines available. When it comes down to it, the best game engine is the one that you’re most comfortable with and that allows you to create what you’d like to create.
Every engine is different or powerful in it’s own way, and if you’re still searching for the best engine for you, my advice is to keep trying different ones until you land on one you enjoy using. Although your preferred engine might be something quite different from the one we will use today, the principles used here are still useful to any fledgling developer.
In this GameMaker Studio 2 tutorial, we will learn how to make a game by starting with an idea and then creating a prototype around that idea.
You will learn a bit of code and a bit of game design as we go.
Note: It is expected that you know some coding basics (like what a variable is), as this tutorial won’t go too in-depth into how the code works. However, if you have zero coding experience, you should still be able to follow along.
Before We Begin the GameMaker Studio 2 Tutorial…
We need an idea before we start prototyping, so let’s come up with one now:
I’d like to make a top-down adventure game where you can slow down time to solve puzzles.
That’s about all you need before entering the prototype phase–no design document, no multi-step plans (yet).
With a simple idea in mind, it’s time to make your own game!
GameMaker Studio 2 Tutorial: Step by Step
Now that we have our idea, it’s time to move on to the actual GameMaker Studio 2 Tutorial. Be sure to follow the steps carefully. Soon, you’ll have your very own 2D game!
So, let’s make a game!
Step 1: Project Setup and Learning the Interface
The first step is to download Game Maker Studio 2 if you don’t already have it. You can start your free trial and download it here.
GMS 2 isn’t free, unfortunately, but it’s still an excellent tool that’s relatively cheap for a high-quality game engine. It’s a flat purchase price, meaning that GMS 2 doesn’t try to take your game’s profits or make you pay monthly.
After you’ve downloaded the game development program, you should be ready to make a game.
One of the benefits of GMS 2 is that it doesn’t require a bunch of scattered dependencies to make it work.
First, click New under Getting Started to begin making your first game.
Next, select GameMaker Language instead of Drag and Drop. Name your project as you please and save it somewhere safe.
GameMaker Language vs Drag and Drop
GML, or GameMaker Language, is GameMaker’s proprietary programming language. While normally proprietary languages are a bad thing, GML is really close to JavaScript as it’s dynamically typed and high level. It’s easy to read and type in, and it functions very similar to other languages. Therefore, it’s not hard to transition to another language, like Lua, after learning GML.
Drag and Drop is GMS 2’s no code solution to making games. It’s fairly easy to use, and it emulates code pretty well. However, I’ve found that visual coding languages like Drag and Drop tend to hold back developers that would be better off just buckling down and learning code. Drag and Drop is simply more work for less functionality, so we’ll be sticking with GML for this tutorial.
Since we’ve just gotten the program, let’s look over the interface.
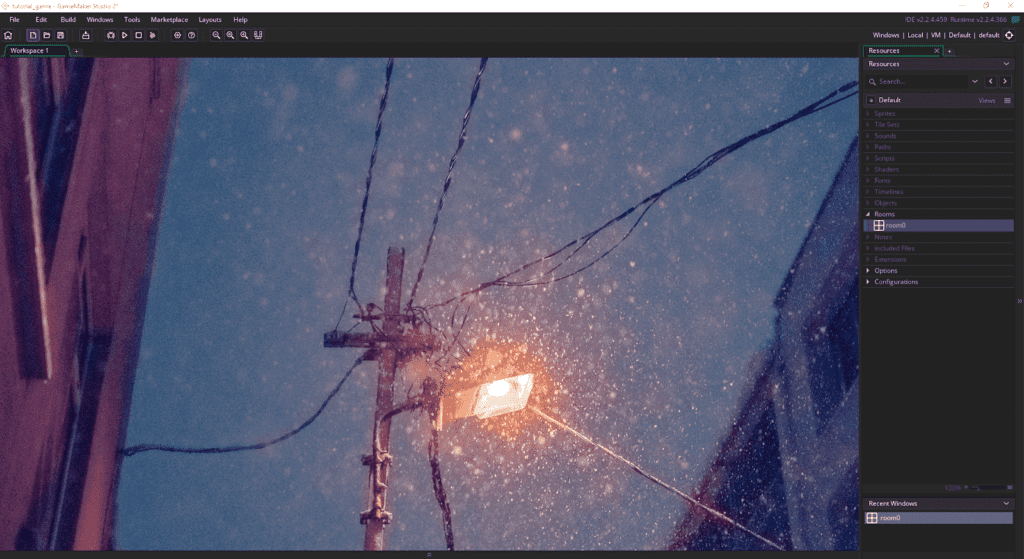
The page you start on is the Workspace. This is where we will be working on the art and code for our project, among other things.
On the right are your resources in the Resource Tree. This will contain every element of your game, whether it’s a sound file, a sprite, or a block of code.
If you click on the Rooms dropdown in the Resource Tree, you’ll see we have a default starting room for our game. Double-clicking it will open the room tab for that room, which is just a black background for now.

"Career Karma entered my life when I needed it most and quickly helped me match with a bootcamp. Two months after graduating, I found my dream job that aligned with my values and goals in life!"
Venus, Software Engineer at Rockbot
Rooms are what they sound like: places for you to put your sprites and game objects.
They can be any size you like, and GMS 2 has a camera/viewport system, so our room doesn’t have to be the same size as our screen.
For now, we will just leave it set at default with the room taking up the whole game window.
If you’d like to see your game (again just a black screen), press F5 to run the game.
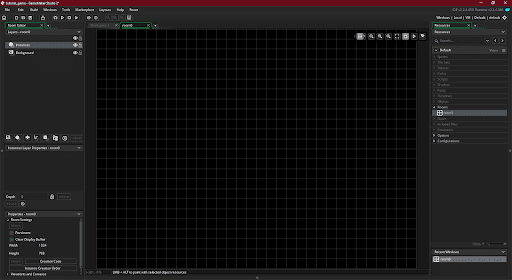
Right now everything is looking very empty, so let’s get started making our game.
Step 2: Making Our Character
The next step we want to take in our GameMaker Studio 2 tutorial is to make a character that the player can control.
GMS 2 uses Objects as general containers for anything that has code attached to it. Objects have a number of built-in properties that will help us as we make our game, so it makes sense to make a new object for our character.
Right-click the Objects drop-down in the resources panel and click Create Object.
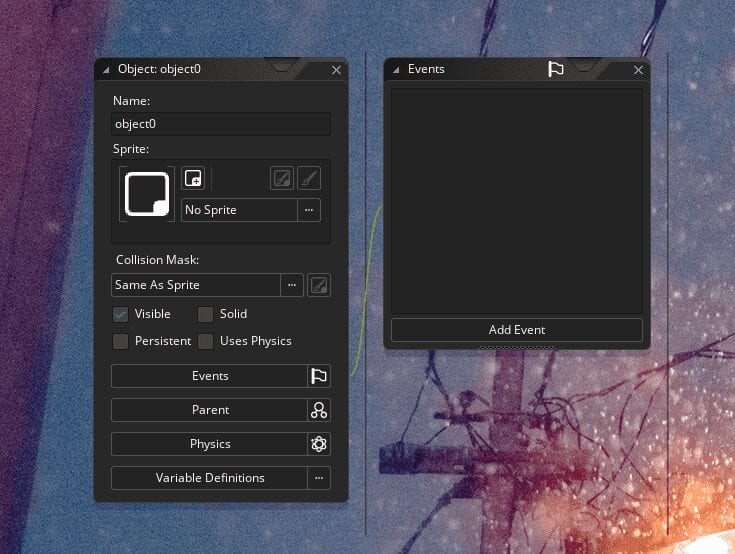
We now get to see an Object Panel.
On the left is the space where we can assign the object a name and a sprite, along with some other options.
On the right is the Events Space, which will be where we put all of our code (more on this later).
Let’s rename our new object to obj_player in the name box.
Naming Practices
It’s a really good idea to name things in a way that will tell you what they are. For example, many people will name their objects obj_somthing or Osomething. That way, they know if what they are using is an object or something else.
We do this because we will often have to mention the names of things in our code. It can become tricky to remember what’s what, so this helps with organization. It’s also useful if you want to name two different things the same name, like obj_player (for the object) and spr_player (for the sprite).
Right now, unfortunately, our player object looks like nothing. That’s because it doesn’t have a Sprite yet. Let’s make a new Sprite and then add it to the player object.
Right-click the Sprites section of the Resource Tree, then click Create Sprite.
Per the box I’ll name this spr_player. Sprites are the game dev word for images. Sprites don’t do anything, they are just pictures that are sometimes animated that we attach to things that have code, i.e. objects, or that we just put in our scene to look pretty.
Our workspace now has two boxes. To navigate the workspace, use the scroll wheel to scroll or the middle mouse button to move around.
Right now, it’s a little small. Let’s make it a bit bigger. Click the small box with four arrows under Image Size and set the width and height to 64×64 pixels under Scale Image.
Now that it’s the right size, let’s draw on it. Click Edit Image near the size button. This will open up the sprite in a new sprite editor tab.
Now, let’s draw something simple to represent our character. Later, we can come back and draw some animated sprites that resemble more than a box.
But to get into making our prototype, we just need something that tells us where our player is and how big they are. Just remember that for now, it will be appearing on a black background, so don’t make it black.
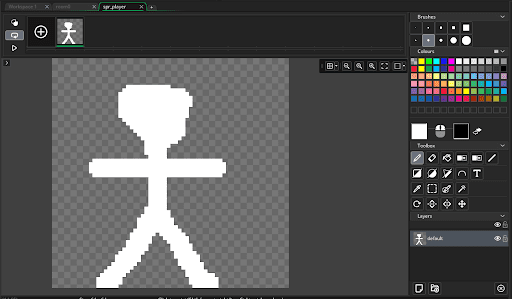
Once you’ve finished, return to the main workspace.
Before attaching the sprite to our player, we will want to change a couple more options: the first is the sprite’s Origin. The Origin is the exact point that the game considers your player to be. And if you rotate your player, they will rotate around this point.
For now, let’s put the Origin at the player’s feet. I’ve found that to be the best place when making a top-down game.
Change the dropdown menu right above the preview of the sprite from top left to bottom center. You’ll also see the small crosshairs move on the sprite. You can change this manually by clicking on the preview. But, for now, let’s keep it at the bottom center.
The only other thing to change is the Bounding Box, or Collision Mask.
The Bounding Box is what lets the game engine know what your sprite is touching, known as Collision Detection. Above your sprite’s preview, click Preview Mask. The origin cursor will disappear and a grey box will show up on your sprite.
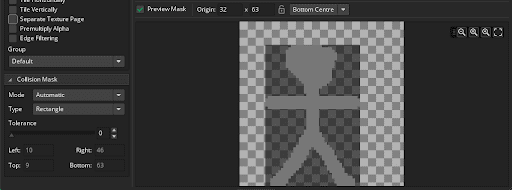
The options for this box are on the left side of the panel under Collision Mask. By default, it’s set to automatic. The automatic setting is pretty smart, and it does a good job, so I won’t change it for my sprite. But you can change it to manual if you want to move around the box. If something is touching that box, it will be touching your player, so keep that in mind if you decide to change it.
Now, we can attach the sprite to our character object, and put that object into our room. Return to our player object by double-clicking its name in the resource tree. Click where it currently says ‘No Sprite’ and select spr_player.
Now that our object has a gorgeous new stand in graphic to display, go to the room tab, then drag and drop obj_player from the resource tree into the room. Anywhere is fine.
Now your player object is in your room, and therefore part of the game. Let’s make sure it all worked and press F5. This will compile and run your game. After a few moments, a window will pop up.
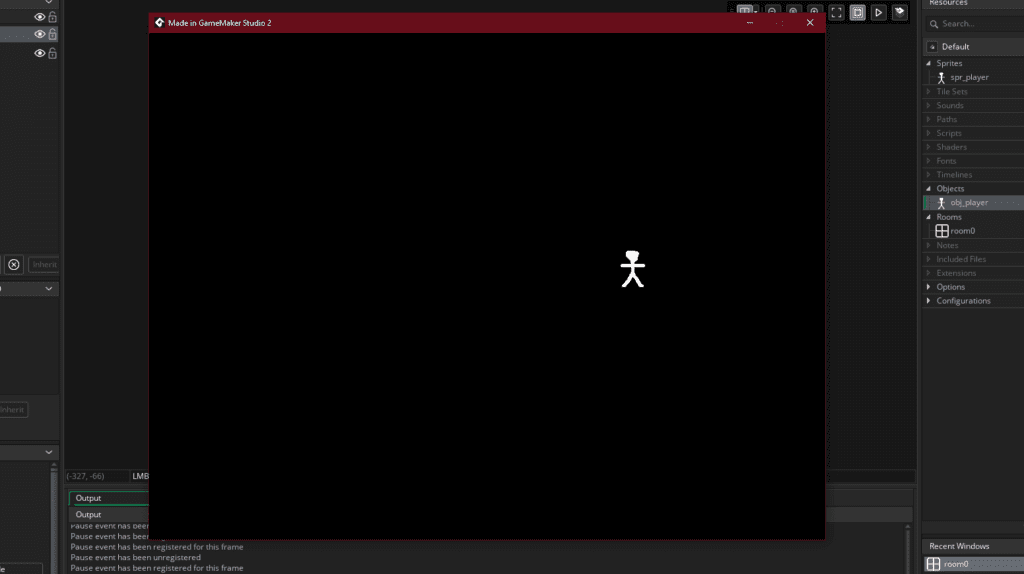
Hopefully, your player object shows up like the above screenshot. Now, you may notice that they don’t do anything. That’s because we haven’t given them anything to do, so they just stand where we’ve placed them. Let’s change that.
Step 3: Getting Our Character to Move
The next step is to finally get into some code to make our character move around on the screen. This is going to be pretty simple code, so don’t worry. We will be using an event to make our player move around the screen.
Events are blocks of code attached to objects that run when that event happens. For example, a Create event will run only once, right when the object is created. If the object is in the room when the game starts, this code will run once when the game starts.
A Step event, on the other hand, will run every step of the game, which for us should be 60 times every second. Just in case, in the Resource Panel, go to Options > Main, and make sure the ‘Game frames per second’ is set to 60.
Return to the workspace and click Add Event in the events box attached to your player object. Then, click Step > Step.
You should now have a Step event and a new window containing a text editor to type your code into.
Now, it’s time to code. We’ll start with an if statement. Type the following:
if (keyboard_check(vk_left)) {
  x=x-5;
}
Type Carefully!
It’s really important to type everything exactly when you’re writing code. Don’t capitalize anything that shouldn’t be capitalized or forget to put any parentheses or brackets where they belong. If you don’t, you’ll get an angry red circle on the left side of the code window, and an error when you try to run your game. Debugging is no fun, so try to copy the code exactly.
The code we just wrote will constantly check if you’re pressing the left arrow key on your keyboard. If the game detects that you’re pressing left on the keyboard, it will run the code in the curly braces.
In this case, the code between the two braces is x=x-5. What we are doing is taking x, which is a special variable that all objects have, and making it equal itself minus 5. The x variable controls the object’s horizontal position on the screen, and it’s measured in pixels.
If x were to equal zero, our object would be at the far left of the screen, and if x was equal to the number of pixels on the screen, our object would be at the far left. When this code runs, we are setting the x position of the object to be 5 pixels less, or 5 pixels closer to the left side of the screen.
Similarly, there is a matching variable called y. This controls the vertical position of our object, with the top being zero.
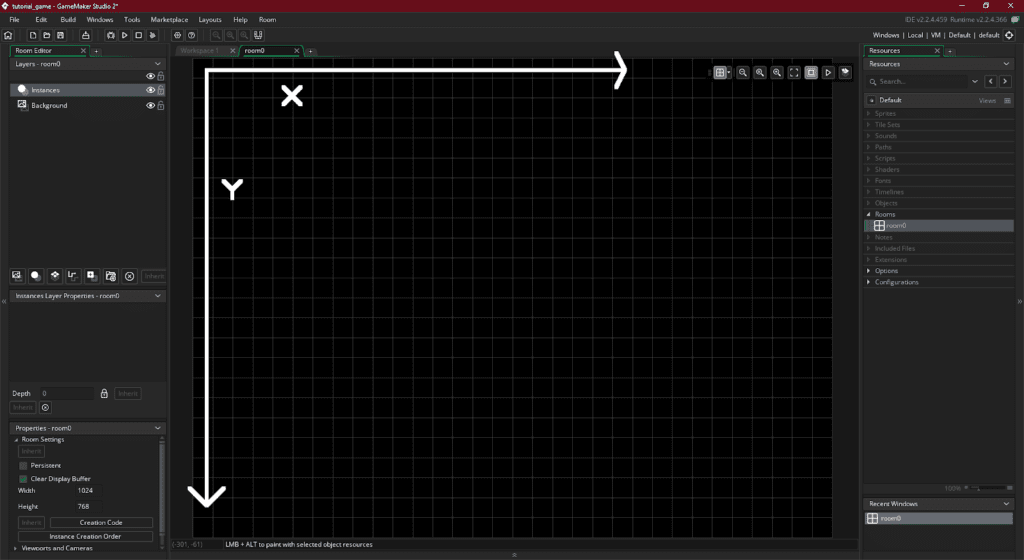
Go ahead and press F5 to run the game. Your character should be able to move left now.
Using what we’ve learned, let’s make the character move right, up, and down as well:
if (keyboard_check(vk_left)) {
  x=x-5;
}

if (keyboard_check(vk_right)) {
  x=x+5;
}

if (keyboard_check(vk_up)) {
  y=y-5;
}

if (keyboard_check(vk_down)) {
  y=y+5;
}
Now, we are checking for the other arrow keys, with the up and down arrows affecting the Y-axis.
Go ahead and run your game again. You should be able to move freely around the screen.
Well done!
Step 4: Creating a Challenge
The next step in our GameMaker Studio 2 tutorial is where things start getting really fun.
Now that we can move, let’s make something that can hurt us, to provide a bit of a challenge for our players.
Make a new sprite, and fill it with red to make a 32×32 red box. I named mine spr_damage. Don’t worry too much about the origin, and the bounding box should be all of the image now (which we want).
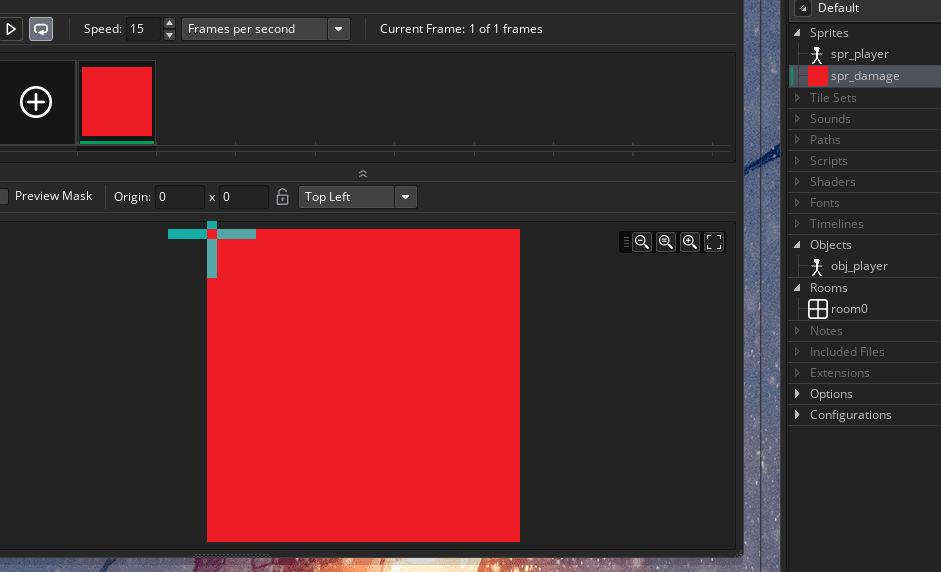
Now, create a new object (I’ve named mine obj_damage), add the red box sprite to the object, and put the object into the middle of the room.
First, we’ll make it so the game restarts if you touch the box.
Return to our player object and add a new event; but this time, go to event > collision > obj_damage, or whatever you named the new object you’ve just made.
As you may expect, the collision event runs its code when the two objects collide–or, more precisely, when their bounding boxes touch each other.
In this event, the code is pretty easy, just put in the following:
game_restart();
I’ll let you guess what this code does. Go ahead and play the game and see what happens if you touch the red box.
Now, this isn’t much of a challenge: the red box isn’t very big, and it’s easy to avoid.
Let’s change this by making it move.
Go to obj_damage, and add a new step event. In the step event, add the following code:
y=y+50

if (y>room_height){
   y = 0;
}
The first thing you’ll notice is that the red box is moving much faster than your character. It moves 50 pixels every frame, compared to your character that moves 5 pixels every frame.
The second part of the code checks to see if the Y position of the object is at the bottom of the screen. If it is, it sets the Y to zero, which is the top of the screen.
This way, the object doesn’t just keep going into the infinite void offscreen. Instead, it teleports back up to the top of the screen when it reaches the bottom.
If you try it out, it’s almost impossible to get past the red box without dying.
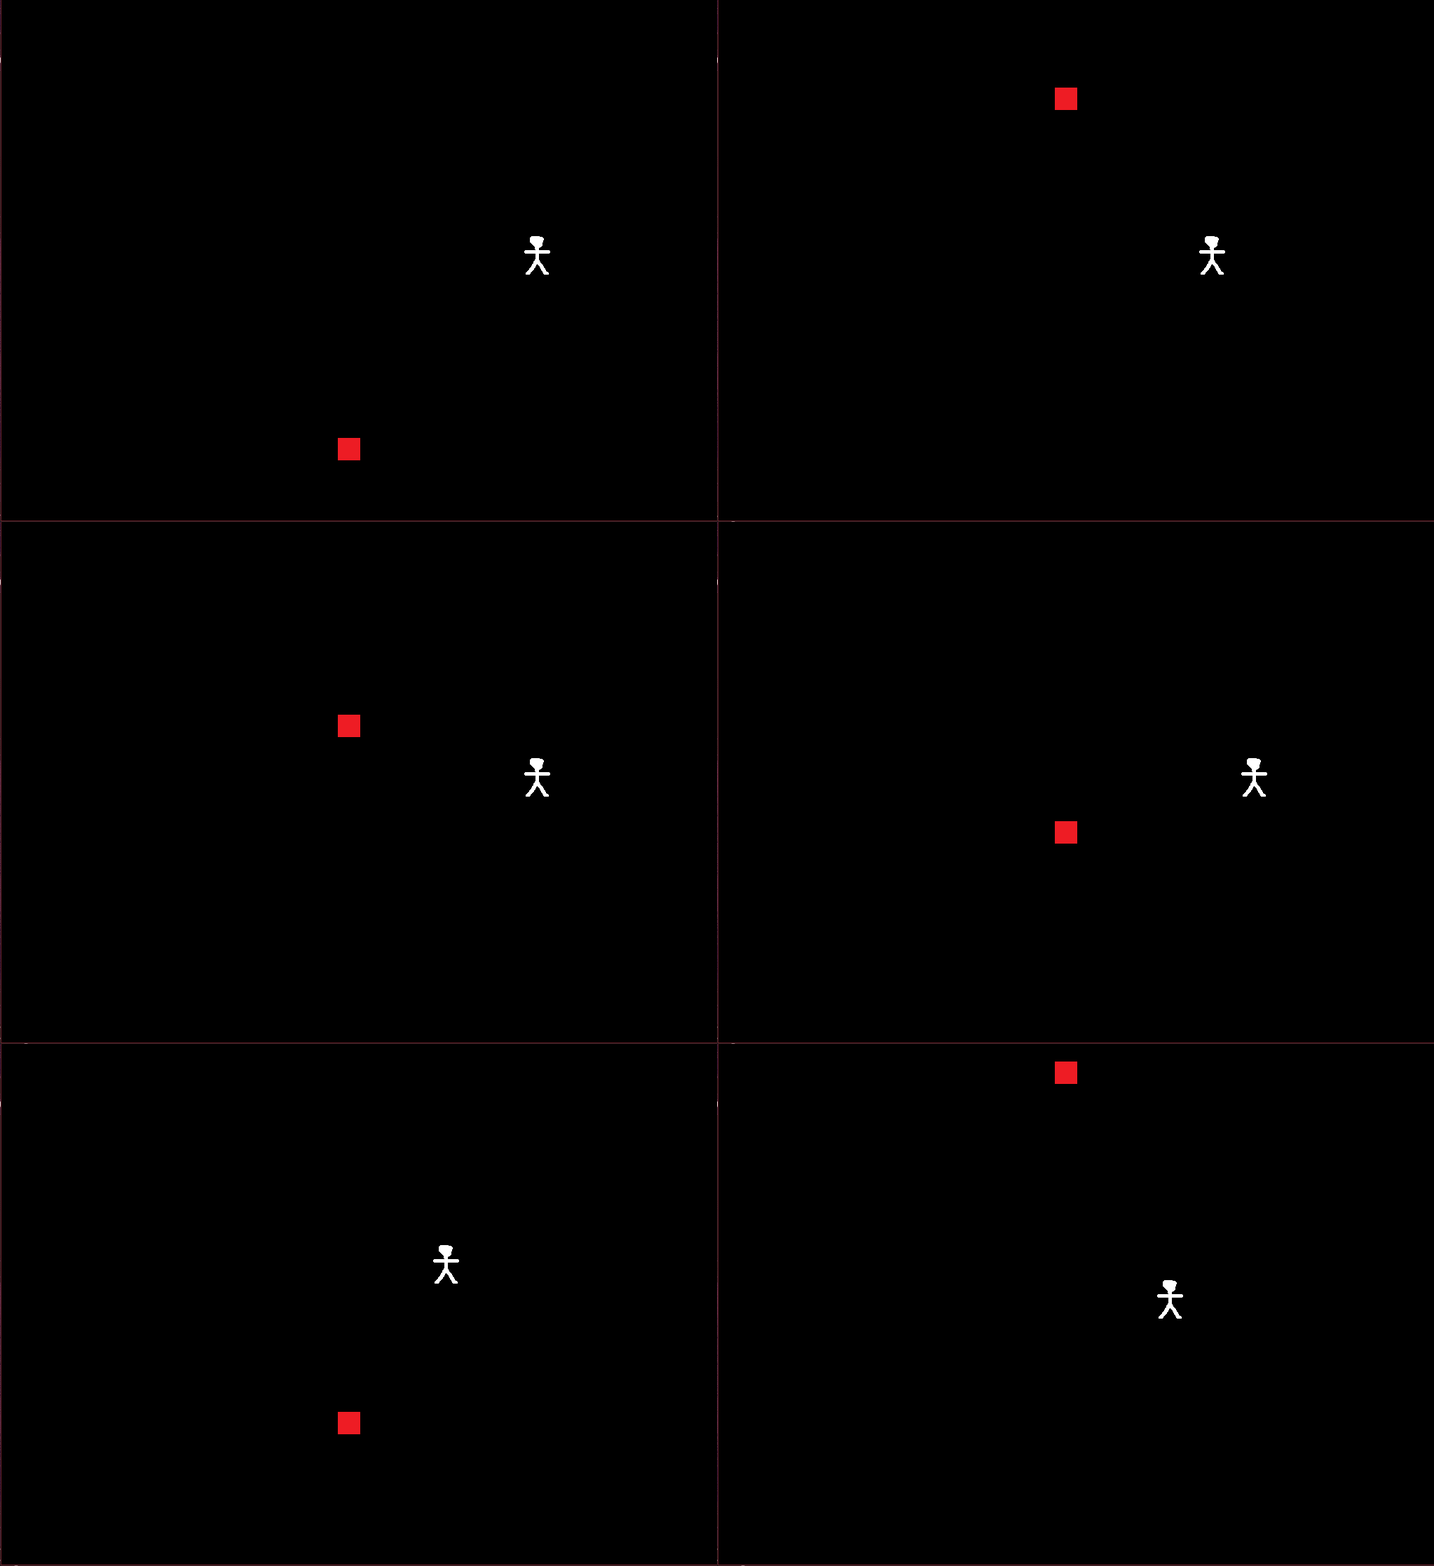
I think it would be a lot easier for our character if they could slow down time, don’t you? Let’s give our character that power.
Step 5: Creating the Main Mechanic
Our GameMaker Studio 2 tutorial is almost done! Let’s add some finishing touches.
We are going to make a new object and call it obj_world. We won’t make a sprite for this one; we don’t want to see it. It just controls some things for us, namely time.
Create a new Create event in our world object. This will only run once, and we’ll use it to establish a global variable. A variable stores something for us, like a number, so we can use it somewhere else.
Putting global. before it makes it so we can access that variable from anywhere, not just from inside that object’s code.
global.time = 1;
Congrats! You just created time!
Now, proceed to make a Step event for the world object. We need to let the player control time, so let’s have them slow it down or speed it up, but only if it’s below or above a certain amount.
We can do this with a second if statement:
if (global.time<1) {
   if (keyboard_check(ord("D"))){
       global.time=global.time+0.05;
   }
}
if (global.time>0.1) {
   if (keyboard_check(ord("A"))){
      global.time=global.time-0.05;
   }
}
To break down the code a little, first we check if time is below 1. If it isn’t, we check if the player is pressing A on the keyboard. If both of those are true, then we increase time by 0.05.
I know that’s a very small number, but remember that this will happen 60 times a second. So, if you hold down A for one second time will increase by 0.6.
We do the same thing again but this time to check for the key D and to lower the amount. This code makes sure time stays between 0.1 and 1.
Now we have to make the time variable do something. Right now, it doesn’t actually affect time–it’s just a number.
Go back to your damage object and change the code so it looks like this:
y=y+(50*global.time);

if (y>room_height){
   y = 0;
}
I know we said we would be controlling time, but controlling the speed at which the box moves is much like controlling time, and it’s a lot easier.
Here, you are multiplying the box’s speed by the time variable.
Before you try it out, don’t forget to drag your world object into the room with your box and player. Even though we can’t see it, we still need it in the room to perform its magic.
Now, go ahead and press F5. Now you should be able to ‘slow time’ by pressing A and speed it up by pressing D.
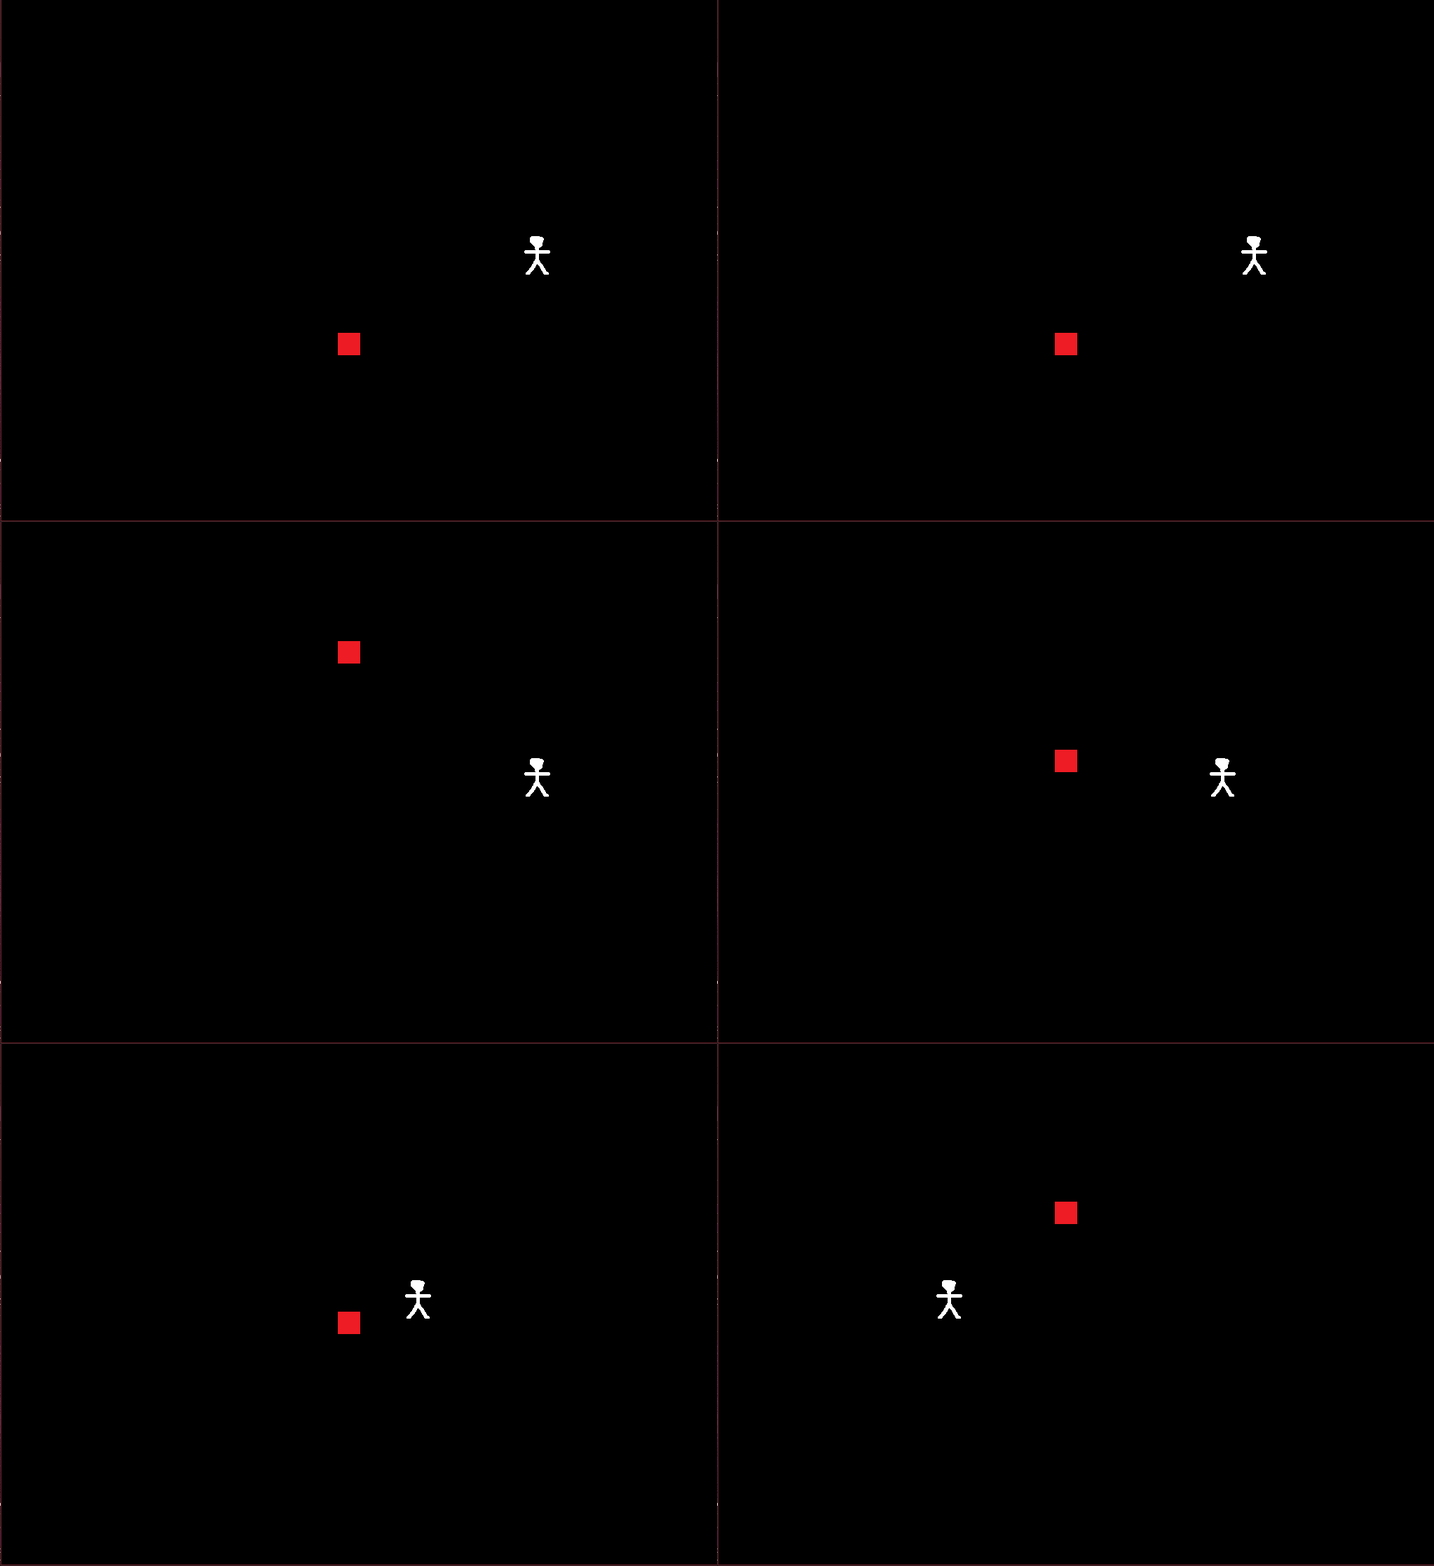
Congrats! You’ve made a (hopefully) functioning prototype for a new game. In case you’re stuck you can get a zip of the entire completed project from our GameMaker Studio 2 tutorial here: tutorial_game_files.zip.
From here, you can move on in the development process to more game logic, doing some pixel art (although, how could you improve on my masterpiece here?), or making a more complete plan with a game design document.
It’s up to you how you want to progress, and hopefully, this tutorial has equipped you with enough to get started and has given you the desire to learn more in the game industry.
About us: Career Karma is a platform designed to help job seekers find, research, and connect with job training programs to advance their careers. Learn about the CK publication.


Nice tutorial man! Really cool and intriguing!